It has been one hell of year. Definitely seemed to fly by, but there was so much that was done.
Let's see, I got kicked out of my rental space. Thankfully I was able to buy a house and move even deeper into being a home studio. Big plans to build out though, we shall see what happens.
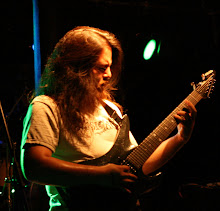
My band, Carrion Kind, finally finished our first full-length album that has been getting great reviews and decent sales. We played a lot of shows this year, all local. It is likely we overplayed, so I plan to dial that back a little bit. Towards the end of the year, we finished writing our second album and began pre-production. 2015 will likely bring our second album.
On the studio front, I also finished up the first Yar EP and the first Salt for Knives EP. This year also saw the release of the Savage Wizdom full length that we worked on in 2013.
This year for me has seen huge growth in live sound gigs. My PA has grown considerably to handle it. I think I am going to see a shift into that realm. Most venues in Santa Fe do not have adequate PA systems or people to run them. Even though the pricing is a race to the bottom at the level I am at, at least it isn't as bad as the studio market. But wow the PA investment for performance is shockingly high.
I have also had the opportunity to make a lot of flyers and promote a lot of shows. Way too many highlights to even list them all. Some of the best shows I was so busy running sound, managing, and likely performing, they are mainly blurs of stress.
So... 2015 is looking bright! I am working with Colossal Swan Dive now. Been asked to join 2 additional bands. Carrion Kind and Strangled by Strangulation has releases on the horizon. My PA is in full force. I might invest in column arrays for more challenging acoustic locations. I think my stage monitoring system could use some love as well.
Bring it!
Friday, January 2, 2015

Thursday, October 9, 2014
Instant Starship noise!
Had this shown to me recently and it makes an instant starship noise! Never know when you'll need it!
This is for the linux super nerds out there!
play -c 2 -n -c1 synth whitenoise lowpass -1 120 lowpass -1 120 lowpass -1 120 gain +10
Then if you just want to feel at home on the Enterprise:
https://www.youtube.com/watch?v=sCSaqkyQVio&list=UUF6R1ZDskjCeBMomUGCtxXw
Bwahahaha!
This is for the linux super nerds out there!
play -c 2 -n -c1 synth whitenoise lowpass -1 120 lowpass -1 120 lowpass -1 120 gain +10
Then if you just want to feel at home on the Enterprise:
https://www.youtube.com/watch?v=sCSaqkyQVio&list=UUF6R1ZDskjCeBMomUGCtxXw
Bwahahaha!
Monday, September 22, 2014
Prepare Yourself! Carrion Kind, Yar, Savage Wizdom, and Salt for Knives!
Wow it has been absolutely crazy the past few months. Also been a really long time since I last posted any sort of news. So much has happened. I had to move to a new house and start building a studio from scratch again. This time I own the damn place so I hope to not have to move again for a while. Every move just seems to hold everything back.
Since I have been still working and spearheading Kronos Creative, the live sound gigs have really been coming on strong. So there have been some big investments in PA Equipment to handle just about any medium sized gig!
Oh yeah and read about me in the Santa Fe Reporter: http://www.sfreporter.com/santafe/article-9114-carrion-kind-kills.html
On the studio front, there have been 4 releases that I have had my hand in!
Carrion Kind - The Collapse of All to Come - My own band. About a year in the making. I did all the tracking and producing. But after pulling my hair out mixing, I hired Dave Otero - www.flatlineaudio.com to do the mixing and mastering. Came out so sick!
Savage Wizdom - A New Beginning - A year of tracking and handed off mixing to Mike Apodaca. He did an excellent job and I am glad he was able to do it. As much as I love mixing, there was just too much turmoil in my life to handle it.
But... not to sweat, I am back in the mixing seat so check out these two bands:
Salt for Knives - Conglomerate of Misery - Was a couple years in the making with my good friend Frank Green. He put together some killer songs that just had to be released. I programmed drums, played bass, and produced/mixed/mastered. Really happy with the outcome!
Yar - Yar Demo - This is a new thrash band about to be unleashed on Santa Fe. Tracked drums at their rehearsal space with a mobile rig. Did overdubs at my new place. They did an awesome job and I had a ton of fun working on this project. Keep an eye out for them, lots of great things coming!
------
So as of now, I guess I am back open for business!
Ready to handle whatever projects may come my way. I can also handle small or large CD Duplication now with some awesome pricing and any packaging you can dream of. I guess these days I am also an official part of Entelodon Records doing whatever I can to grow the scene!
Since I have been still working and spearheading Kronos Creative, the live sound gigs have really been coming on strong. So there have been some big investments in PA Equipment to handle just about any medium sized gig!
Oh yeah and read about me in the Santa Fe Reporter: http://www.sfreporter.com/santafe/article-9114-carrion-kind-kills.html
On the studio front, there have been 4 releases that I have had my hand in!
Carrion Kind - The Collapse of All to Come - My own band. About a year in the making. I did all the tracking and producing. But after pulling my hair out mixing, I hired Dave Otero - www.flatlineaudio.com to do the mixing and mastering. Came out so sick!
Savage Wizdom - A New Beginning - A year of tracking and handed off mixing to Mike Apodaca. He did an excellent job and I am glad he was able to do it. As much as I love mixing, there was just too much turmoil in my life to handle it.
But... not to sweat, I am back in the mixing seat so check out these two bands:
Salt for Knives - Conglomerate of Misery - Was a couple years in the making with my good friend Frank Green. He put together some killer songs that just had to be released. I programmed drums, played bass, and produced/mixed/mastered. Really happy with the outcome!
Yar - Yar Demo - This is a new thrash band about to be unleashed on Santa Fe. Tracked drums at their rehearsal space with a mobile rig. Did overdubs at my new place. They did an awesome job and I had a ton of fun working on this project. Keep an eye out for them, lots of great things coming!
------
So as of now, I guess I am back open for business!
Ready to handle whatever projects may come my way. I can also handle small or large CD Duplication now with some awesome pricing and any packaging you can dream of. I guess these days I am also an official part of Entelodon Records doing whatever I can to grow the scene!
Tuesday, June 10, 2014
Converting DDP to CUE and CUE to WAV/MP3
When working with professional mastering engineers, you will often get a DDP image of your master. Or sometimes you get a CUE with a CDT and attached WAV file. Here are a few tricks to dealing with those.
DDP Mastering Tools for the Command Line
You can get it for Windows or Linux or Mac. I prefer Linux, but basically it is just a zip file with binary executables ready to go. But keep in mind for 64-bit Linux, you have to install the 32-bit libraries (sudo apt-get install ia32-libs). Once you have them where you want, you will have to open a shell in windows (cmd). Mac is similar to Linux, but you will have to find the terminal on your own.
Edit: 7/2015
Just found this poking around the web. It is a GUI version of some of these tools.
http://forum.cockos.com/showpost.php?p=1040305&postcount=294
But again I like Linux and the command line (should work for mac too):
DDP Manipulation
If you pay money you can get the DDP tools from Sonaris. Wavlab can only burn a DDP to an image... lame. If you are comfortable with the command line, you can use FOR FREE:DDP Mastering Tools for the Command Line
You can get it for Windows or Linux or Mac. I prefer Linux, but basically it is just a zip file with binary executables ready to go. But keep in mind for 64-bit Linux, you have to install the 32-bit libraries (sudo apt-get install ia32-libs). Once you have them where you want, you will have to open a shell in windows (cmd). Mac is similar to Linux, but you will have to find the terminal on your own.
# to get the help
ddpinfo --help
cue2ddp --help
cdtinfo --help

# verify correctness of DDP
ddpinfo --verify /path/to/DDP/Folder

# extract cue and wav
ddpinfo -w shiz.wav /path/to/DDP/Folder
Then you can listen to the wav file or use something like ImgBurn or whatever burning software you like that supports .CUE images.
Edit: 7/2015
Just found this poking around the web. It is a GUI version of some of these tools.
http://forum.cockos.com/showpost.php?p=1040305&postcount=294
Splitting a CUE to Individual WAV
Now that isn't all, say you want individual WAV's for online distribution or MP3's. Well in Windows you can check out:But again I like Linux and the command line (should work for mac too):
# stuff to install
aptitude install shntool cuetools

# just to break into tracks
shntool split -f shiz.cue -o wav shiz.wav

# break into tracks winth Band_Name-Album_Title-00-Song_Title.wav
# notice underscores for spaces and dashes for sections
# RTFM for more options
shntool split -f shiz.cue -o wav -m \ _:- -t %p-%a-%n-%t shiz.wav

# Then if you want to convert the waves from above to MP3 in one shot
# It uses the naming convention above to determine the track names and fill the ID3 tags properly
# Linux/Mac only, I did this once in Windows Powershell, but it sucked
for i in `ls *.wav`; do lame --preset studio --ta "Artist Name" --tl "Album Name" --ty "2011" --tg "Metal" --tn "$(echo $i|awk -F\- '{print $3}')" --tt "$(echo $i|awk -F\- '{print $4}'|awk -F\. '{print $1}'|sed 's/_/ /g')" $i $(echo $i|awk -F\. '{print $1}').mp3; done
This will sure help me. Hope it helps you!
Probably should throw this into a shell script...
Friday, March 21, 2014
Exporting Cubase Tracks with the Click
Been a while since I have posted... busy yo! And this really needs pictures and shit, but I am just going to talk about it and you will be on your own to figure it out.
Here is a problem that has plagued me for years with all sorts of weird workarounds. You work with a band to get the scratch tracks and tempo's all set. Then they want a copy to take home and practice to... fuckin' yes! Oh wait.. how the hell do I do that!?!?!
I have heard and seen all sorts of workarounds. Micing the studio monitors soloing the click and recording that. Routing the click to a mono bus and routing that to an input and recording it. Shit I have even tried a "recorder" VST plugin on the master bus to record what is played at that point. Such bullshit and I don't know why for all these YEARS Cubase doesn't have this.
My personal favorite was using Cubase LM-7 drum machine with its built in Clave sample. To do that you make a MIDI track, use the quantize to draw hits on 1-4. Then Ctrl-K to repeat it the number of times in the song. Mix to taste and export. Of course you can use any VSTi you want.
As LM-7 was dropped (Cubase 4?) I found an old folder online where you could still get LM-7. Then moving to Cubase 7, I started using the "Click" sample in Groove Agent ONE. Ok great, this works... but you get used to hearing a certain click. So if you practice to the clave, you want the clave. All good, just manage it in the session. But that is a pain and you can't use Control Room, or "c" to turn it on and off. Workable but a pain.
So then I would sample LM-7's clave and put it into the Cubase's click configuration as the click wav file. Ok cool. But the bleeps are better IMO. They cut through the mix better and because of that, headphone bleed isn't as bad since it doesn't have to be as cranked in the headphones.
Some guys that use a click regularly don't have a problem switching from the clave the practiced to and the bleep's of cubase (I prefer the bleeps). And I mean you know how everyone practices to a click, no problem right!?!?
Well today I had a thought, sample Cubase's actual click sound and put that sample into Groove Agent ONE. Why didn't I think of this sooner!?!?
So to add a sound to Groove Agent ONE, you just have to import it into the song or find it in the media bay. Then drag and drop it onto the pad of the note you want. Easy! Do that twice and you are done.
Now... sampling the fucking click sound... well thankfully someone already did that for you!
Everyone Hates the Default Click, Shut up I fixed it for you.
It is about reaper, but it even has logic and pro-tools clicks. Now I can even have the pro-tools click for those dudes that are used to that!
Make one measure of a MIDI file and CTRL-k is the magic sauce for repeat.
You are welcome!
Tuesday, October 4, 2011
Using the Dreamplug's Crypto Chip
After talking with colleagues regarding this box (there are now several around) I learned that the encryption is pretty slow. But this is without the hardware encryption enabled. So let's see if it can be enabled.
For more information visit:
http://www.newit.co.uk/forum/index.php?topic=2030.0
Intel(R) Pentium(R) CPU G6950 @ 2.80GHz
Fix the versioning: http://chris.dzombak.name/blog/2010/03/building-openssl-with-symbol-versioning
Yeah way way faster. Oh and SSH uses OpenSSL. So be careful. It can cut your connection and you will need the JTAG to reconnect.
For more information visit:
http://www.newit.co.uk/forum/index.php?topic=2030.0
Reference
Intel(R) Pentium(R) CPU G6950 @ 2.80GHz
$ openssl speed -evp aes128
Doing aes-128-cbc for 3s on 16 size blocks: 12582002 aes-128-cbc's in 3.00s
Doing aes-128-cbc for 3s on 64 size blocks: 4295548 aes-128-cbc's in 2.99s
Doing aes-128-cbc for 3s on 256 size blocks: 1121451 aes-128-cbc's in 3.01s
Doing aes-128-cbc for 3s on 1024 size blocks: 284735 aes-128-cbc's in 3.00s
Doing aes-128-cbc for 3s on 8192 size blocks: 35731 aes-128-cbc's in 3.00s
OpenSSL 0.9.8e-fips-rhel5 01 Jul 2008
built on: Tue Dec  7 12:16:36 EST 2010
options:bn(64,32) md2(int) rc4(idx,int) des(ptr,risc1,16,long) aes(partial) blowfish(idx)
compiler: gcc -fPIC -DOPENSSL_PIC -DZLIB -DOPENSSL_THREADS -D_REENTRANT -DDSO_DLFCN -DHAVE_DLFCN_H -DKRB5_MIT -I/usr/kerberos/include -DL_ENDIAN -DTERMIO -Wall -O2 -g -pipe -Wall -Wp,-D_FORTIFY_SOURCE=2 -fexceptions -fstack-protector --param=ssp-buffer-size=4 -m32 -march=i686 -mtune=generic -fasynchronous-unwind-tables -Wa,--noexecstack -DOPENSSL_USE_NEW_FUNCTIONS -fno-strict-aliasing -DOPENSSL_BN_ASM_PART_WORDS -DOPENSSL_IA32_SSE2 -DOPENSSL_BN_ASM_MONT -DSHA1_ASM -DMD5_ASM -DRMD160_ASM -DAES_ASM
available timing options: TIMES TIMEB HZ=100 [sysconf value]
timing function used: times
The 'numbers' are in 1000s of bytes per second processed.
type             16 bytes     64 bytes    256 bytes   1024 bytes   8192 bytes
aes-128-cbc      67104.01k    91944.84k    95379.22k    97189.55k    97569.45k
$ openssl speed -evp aes128
Doing aes-128-cbc for 3s on 16 size blocks: 1520029 aes-128-cbc's in 3.00s
Doing aes-128-cbc for 3s on 64 size blocks: 451973 aes-128-cbc's in 3.00s
Doing aes-128-cbc for 3s on 256 size blocks: 118487 aes-128-cbc's in 3.00s
Doing aes-128-cbc for 3s on 1024 size blocks: 29964 aes-128-cbc's in 2.99s
Doing aes-128-cbc for 3s on 8192 size blocks: 3758 aes-128-cbc's in 3.00s
OpenSSL 0.9.8o 01 Jun 2010
built on: Thu Feb 10 21:19:23 UTC 2011
options:bn(64,32) md2(int) rc4(ptr,int) des(idx,risc1,4,long) aes(partial) blowfish(idx)
compiler: gcc -fPIC -DOPENSSL_PIC -DZLIB -DOPENSSL_THREADS -D_REENTRANT -DDSO_DLFCN -DHAVE_DLFCN_H -DL_ENDIAN -DTERMIO -O2 -Wa,--noexecstack -g -Wall
available timing options: TIMES TIMEB HZ=100 [sysconf value]
timing function used: times
The 'numbers' are in 1000s of bytes per second processed.
type             16 bytes     64 bytes    256 bytes   1024 bytes   8192 bytes
aes-128-cbc       8106.82k     9642.09k    10110.89k    10261.92k    10261.85k
HOWTO Configure Hardware AES with OpenSSL
First I had to get some things set up:
#NOTE: Be aware of space, I moved a lot of directories to an attached esata disk for more space and speed. Then symlinked them into place.
sudo aptitude install build-essential
cd /usr/src
wget http://dreamplug.googlecode.com/files/linux-2.6.33.6.tar.bz2
tar -xjf linux-2.6.33.6.tar.bz2
ln -s linux-2.6.33.6 linux
ln -s /usr/src/linux-2.6.33.6 /lib/modules/2.6.33.6/build
ln -s /usr/src/linux-2.6.33.6 /lib/modules/2.6.33.6/source
cd /usr/src/linux
wget http://archlinuxarm.org/mirror/with-linux/2.6.33/2.6.33.6/sheeva-2.6.33.6.config
zcat /proc/config.gz > .config
make uImage && make modules
wget http://download.gna.org/cryptodev-linux/cryptodev-linux-1.0.tar.gz
tar -xzf cryptodev-linux-1.0.tar.gz
cd cryptodev-linux-1.0
make; make install
echo "cryptodev" >> /etc/modules
modprobe cryptodev
wget http://sourceforge.net/projects/ocf-linux/files/ocf-linux/20110530/ocf-linux-20110530.tar.gz/download -O ocf-linux-20110530.tar.gz
tar -xzf ocf-linux-20110530.tar.gz
wget http://www.openssl.org/source/openssl-0.9.8r.tar.gz
tar -xzf openssl-0.9.8r.tar.gz
cd openssl-0.9.8r
patch -p1 < ../ocf-linux-20110530/patches/openssl-0.9.8r.patch
./config shared threads zlib --with-cryptodev --openssldir=/etc/ssl --libdir=/usr/lib --prefix=/usr
make depend; make; make install
Fix the versioning: http://chris.dzombak.name/blog/2010/03/building-openssl-with-symbol-versioning
Results
Then here are the results after with OpenSSL
$ openssl speed -evp aes128
Doing aes-128-cbc for 3s on 16 size blocks: 78428 aes-128-cbc's in 0.14s
Doing aes-128-cbc for 3s on 64 size blocks: 76194 aes-128-cbc's in 0.17s
Doing aes-128-cbc for 3s on 256 size blocks: 63152 aes-128-cbc's in 0.06s
Doing aes-128-cbc for 3s on 1024 size blocks: 39103 aes-128-cbc's in 0.04s
Doing aes-128-cbc for 3s on 2048 size blocks: 23210 aes-128-cbc's in 0.00s
OpenSSL 0.9.8r 8 Feb 2011
built on: Thu Jul 14 09:50:39 MDT 2011
options:bn(64,32) md2(int) rc4(ptr,char) des(idx,cisc,16,long) aes(partial) idea(int) blowfish(ptr)
compiler: gcc -fPIC -DOPENSSL_PIC -DOPENSSL_THREADS -D_REENTRANT -DDSO_DLFCN -DHAVE_DLFCN_H -DHAVE_CRYPTODEV -DL_ENDIAN -DTERMIO -O3 -fomit-frame-pointer -Wall
available timing options: TIMES TIMEB HZ=100 [sysconf value]
timing function used: times
The 'numbers' are in 1000s of bytes per second processed.
type             16 bytes     64 bytes    256 bytes   1024 bytes   2048 bytes
aes-128-cbc       8963.20k    28684.80k   269448.53k  1001036.80k 47534080.00k
Yeah way way faster. Oh and SSH uses OpenSSL. So be careful. It can cut your connection and you will need the JTAG to reconnect.
Monday, July 11, 2011
Setting up the Dreamplug
Just recently I got a Dreamplug from Global Scale Technologies. It is pretty cool in that it only draws 5W of power and comes with plenty of processing power and features for all sorts of things. It is initially designed for prototyping for full scale products. However it is great for the hobbyist to mess with and have a lower powered computer for servers, voip, etc.
In my case I got one to primarily act as little home server for file sharing, ssh, printer sharing, and scanner sharing. Eventually I would like to deploy one at the studio for backups and archiving as well. In the past I have used old desktops, but my latest one died and I got tired of paying the money to run a whole machine that sits idle 90% of the time. But as with anything the 10% of the time I need it, I need it, so it is definitely worth keeping around.
These are just some notes of things I ran into and I hope someone will find useful. I know I will on the next round with one of these.
Of course the website and user guide pretty much has zero information on it. At least it has nothing very useful. It mainly talks about the ports and interface and such.
In the box you get way more that it seems. The power supply can disconnect and be run with a DC cable. It can act as a brick or you can use another power cable. It comes with sliding connectors allowing you to switch. It also comes with cover plates for exposed contacts and a Cat5e network cable (which will handle gigabit).
Mine came preloaded with Debian Lenny. I was expecting it to have Ubuntu. Not sure what is going on there. Seems that many pre-shipped with Ubuntu, but mine is Debian, so no clue. But things did work out of the box. I am more of a RedHat guy and got spoiled with the GUI's in Ubuntu. So Debian (even though closely related to Ubuntu) is different enough to be a little slow going.
Since it came preloaded it was already partitioned and everything. It looks to have about 2GB of onboard storage which is nice. It starts up as a wireless access point as you can see from /root/init-setup.sh. It also starts up Samba, SSH, Bluetooth, FTP and (attempts) lighttpd. The AP is automatically set up to bridge to eth0 which is DHCP. It also boots at runlevel 2.
To get on the machine, I had eth0 DHCP and I picked it up off of my DHCP server. You can ssh in with root and the default password (check the UserGuide for it).
Oh and BTW, the LED's are obnoxiously bright. If you look in the init-setup.sh script and the wlan script, you can see how to turn them on and off. But not sure how to dim them and definitely not how manipulate the power one. May need some opaque tape for that.
So for my setup first things first:
- Change root passwd
- Turn off the AP by running wlan.sh
- Remove it by commenting out /root/init-setup.sh in /etc/rc.local. That will also turn off bluetooth. On reboot, it will be LAN only.
- Set a static IP for eth0. Since mine will just be a server (already have a firewall/router) there is no need really for eth1 or wireless. So you have to edit /etc/network/interfaces and change it to static with the right address, gateway, and netmask. However a bit of a gotcha is that ifplugd will stomp on it. So you must take out eth0 out of /etc/default/ifplugd. More information available here: http://www.newit.co.uk/forum/index.php/topic,1960.msg5610.html#msg5610.
- Change hostname in /etc/hostname
- Oh yeah and install NTP (aptitude install ntp) which defaults to the debian pool. Then change the timezone: dpkg-reconfigure tzdata
After that initial round, that at least takes care of the tricky stuff. After that it should all be regular *nix stuff.
Other stuff I did:
- Installed LAME which wasn't as trivial as I had hoped. Added "deb http://www.debian-multimedia.org/ lenny main" to /etc/sources. Then I had to add the GPG key "gpg --keyserver pgpkeys.mit.edu --recv-key 07DC563D1F41B907" then "gpg -a --export 07DC563D1F41B907 | apt-key add -". Then "apt-get update." Took a few rounds of this to get some of the additional keys and I had to comment out a local apt repository from global scale. Then trivially "apt-get install lame" More information about getting lame from here: http://parabans.com/howto-install-lame-mp3-ripper-on-debian-linux-using-apt-get/. (Lame is slow as shit on this box BTW)
- Installed smbclient (apt-get install smbclient) which then updated the rest. I decided to swap out the smb.conf file with the default one since it has comments that act as documentation.
- Installed nmap, mainly to make sure I close all the right ports. Right now my only linux machine is a netbook with a crazy small keyboard.
- Removed mysql from the startup scripts then uninstalled ( update-rc.d -f mysql remove, etc. apt-get remove mysql-common, etc.)
- apt-get autoremove since there were some packages it was complaining about.
- Added Cups Printing: http://wiki.debian.org/SystemPrinting
aptitude update
aptitude install cups cups-client hpjis
aptitude install links
links http://localhost:631/
- Then added Scanner Sharing
aptitude install sane
... bunch of configuration
- Installed and configured samba
Performance specs are decent depending on what you are doing. Anything using the memory cards is dog slow. Off of an Esata Hard Drive things are much better. Samba speeds are excellent, it also does great as a scanning server. SSH under high loads is pretty slow (ie. sshfs). I set up a squid server and changing the default cache directory to hit the Esata drive makes it much much faster. I tested some basic MP3 compression and file compression tests, they are also slow.
Essentially this thing is geared for I/O such as a NAS or router. While it will work doing some CPU intensive stuff, don't hold your breath. Excellent for a power efficient small server with great I/O. Pretty happy with what it will be doing for me.
I will be posting more tests regarding SSH port forwarding and web page delivery as time progresses.
Sunday, July 3, 2011
Some Updates
Well it has been a long time since I have posted anything. As many of you know, I have moved back to Santa Fe, NM. It is nice to be back and I have been swamped with business. Hopefully there will some releases that I will be able to talk about here soon.
I have teamed up with Jesse Albright of DMBD Audio and renamed his studio to Desert Den Studios (www.desertden.com). With his rooms and my gear, we have built a fairly capable studio.
For the past 9 months it has been extremely busy which is good! But hence why the web presence and other musical endeavors have been ignored. That is about to change! Since I have some time away from my dayjob due to the Las Conchas fire, I can refocus on getting things back up to date.
I have teamed up with Jesse Albright of DMBD Audio and renamed his studio to Desert Den Studios (www.desertden.com). With his rooms and my gear, we have built a fairly capable studio.
For the past 9 months it has been extremely busy which is good! But hence why the web presence and other musical endeavors have been ignored. That is about to change! Since I have some time away from my dayjob due to the Las Conchas fire, I can refocus on getting things back up to date.
Thursday, September 23, 2010
GSP1101 Impulse Testing with 5150 Model
Well just in case you hadn't heard, the C55 Beta Firmware was released for the Digitech GSP1101 on http://www.mustbebeta.com/. If you haven't tried the beta firmware yet, DO IT. It adds so many features to the GSP1101. Stan, as he calls himself, has been a lifesaver to the GSP1101 and I hope that Digitech takes notice of how customer service and product support should work.
There have been tons of additional features. The C48 and previous added a 5150 model for high gain, plus a bunch others. C55 adds more flexible routing like a compressor in the loop, pre/post FX, etc.
The most notable new feature is the ability to load up to 10 Impulse Response cabinets. Personally I feel the stock cabinet modeling is the weakness of most modelers, GSP1101 included.
The downside to the GSP1101 Impulse Response loading is that it can only load the first 128 "taps" due to memory restrictions. This test is to see how much it affects the tone.
The Impulse I used is one I made with my ENGL Powerball for the Impulse vs. Mic Test. But to put things into perspective, I also used S-PresHigh by Catharsis. Then to test the modeling, I also ran the Nick Crow 8505 through both impulses.
Guitar is a Schecter A-7 7-String with Seymour Duncan Jazz Pickups Reamped through an Edcor Transformer. DI was cut with my LineDriver/Buffer box.
Drums are Steven Slate, Bass is a Lakland through Guitar Rig 4 and a limiter. Master bus has T-Racks Linear Phase EQ just rolling off the rumbly low end and then Steven Slate's FG-X for level.
Guitars have ZERO PROCESSING on them. These are just raw, lots of issues of course with low end rumble and high end fizz. For impulses a high and low-pass are essential, but I wanted to give the raw sound. I did do my best to match levels.
The GSP1101 settings are an 808 low drive, high volume, tone around 70% into the 5150II model set flat with gain around 70%.
Nick Crow 8505 Settings are Flat with gain around 70% with BTE's TS Secret boosting with the same settings as the GSP1101.
Impulse was made with an ENGL Powerball into and ENGL V412 with Celestion Vintage 30's. Single SM57 through an ACMP-73 chinese N*eve clone.
Special thanks to LePou's LeCab, Nick Crow's 8505 Amp Simluator and BTE Audio TS Secret.
So here is the order of the clip:
Obviously some big differences! It is almost like GSP1101 is tuned for the Powerball Impulses and the 8505 for the Catharsis ones.
I tried other impulses from Catharsis, Alu, and Recabinet loaded into the GSP1101. They sounded really hollow and generally bad. I didn't spend a ton of time with it, but that is definitely something to consider. I bet it has something to do with the length or the impulses not being cut at zero. But I do like the improvement of sound with my own, which is what I care about.
Right now, the GSP1101 will continue to be in my Live Rig since I think it sounds great there. Been GAS'ing for an AxeFX, but the price just scares me. I like the processors for live work and for writing scratch tracks, but it would be sweet to have keeper tracks or at least better sounding tracks.
By popular demand, here is the The Powerball Impulse I used.
There have been tons of additional features. The C48 and previous added a 5150 model for high gain, plus a bunch others. C55 adds more flexible routing like a compressor in the loop, pre/post FX, etc.
The most notable new feature is the ability to load up to 10 Impulse Response cabinets. Personally I feel the stock cabinet modeling is the weakness of most modelers, GSP1101 included.
The downside to the GSP1101 Impulse Response loading is that it can only load the first 128 "taps" due to memory restrictions. This test is to see how much it affects the tone.
The Impulse I used is one I made with my ENGL Powerball for the Impulse vs. Mic Test. But to put things into perspective, I also used S-PresHigh by Catharsis. Then to test the modeling, I also ran the Nick Crow 8505 through both impulses.
Guitar is a Schecter A-7 7-String with Seymour Duncan Jazz Pickups Reamped through an Edcor Transformer. DI was cut with my LineDriver/Buffer box.
Drums are Steven Slate, Bass is a Lakland through Guitar Rig 4 and a limiter. Master bus has T-Racks Linear Phase EQ just rolling off the rumbly low end and then Steven Slate's FG-X for level.
Guitars have ZERO PROCESSING on them. These are just raw, lots of issues of course with low end rumble and high end fizz. For impulses a high and low-pass are essential, but I wanted to give the raw sound. I did do my best to match levels.
The GSP1101 settings are an 808 low drive, high volume, tone around 70% into the 5150II model set flat with gain around 70%.
Nick Crow 8505 Settings are Flat with gain around 70% with BTE's TS Secret boosting with the same settings as the GSP1101.
Impulse was made with an ENGL Powerball into and ENGL V412 with Celestion Vintage 30's. Single SM57 through an ACMP-73 chinese N*eve clone.
Special thanks to LePou's LeCab, Nick Crow's 8505 Amp Simluator and BTE Audio TS Secret.
So here is the order of the clip:
- GSP1101 -> Powerball Impulse 128 Taps into GSP1101
- GSP1101 -> Powerball Impulse using LeCab
- GSP1101 -> Catharsis S-PresHigh using LeCab
- Nick Crow 8505 -> Catharsis S-PresHigh using LeCab
- Nick Crow 8505 -> Powerball Impulse using LeCab
- GSP1101 -> Vintage 4x12 Stock Cab Sim
FULL BAND CLIP:
GUITARS ONLY:
Obviously some big differences! It is almost like GSP1101 is tuned for the Powerball Impulses and the 8505 for the Catharsis ones.
I tried other impulses from Catharsis, Alu, and Recabinet loaded into the GSP1101. They sounded really hollow and generally bad. I didn't spend a ton of time with it, but that is definitely something to consider. I bet it has something to do with the length or the impulses not being cut at zero. But I do like the improvement of sound with my own, which is what I care about.
Right now, the GSP1101 will continue to be in my Live Rig since I think it sounds great there. Been GAS'ing for an AxeFX, but the price just scares me. I like the processors for live work and for writing scratch tracks, but it would be sweet to have keeper tracks or at least better sounding tracks.
By popular demand, here is the The Powerball Impulse I used.
Tuesday, June 1, 2010
Impulse vs. Real Cabinet
I have always been a fan of modelers and hope that the next generation will be better than the last. It is a great theory, a whole room of amps and FX in a single software package or device. The problem is that they sound usable at best. Tube amps just dominate in so many ways.
However, the tube amps are large and heavy, require expensive maintenance, and are just a pain all the way around. Not to mention they are comparatively much more expensive even with offshore manufacturing closing the gap. Also in the studio (and even live) they are incredibly inconvenient. In order to sound good they must be loud and mic'd properly in a good room. Modelers can sound their best completely direct.
The reason I still support modeling is that I can record at anytime and anywhere with a laptop and USB interface. Also when mixing, a badly mic'd or improperly dialed amp can sound horrible. Or you need a specific tone that you don't have or don't have the time to mic, a modeler can be just the ticket.
Anyway I personally think one of the biggest breakthroughs and a weakness with modeling has been impulse responses of speaker cabinets. Essentially it is a sine sweep sampling. Do some searches and you will find that there are lots of links and discussion and packs for sale.
They sound very good, especially compared to other speaker simulation techniques, but they still lack something. Many say they don't breathe, that they are static and not 3D sounding. The problem is that most people don't really have the time to do a proper shoot out. Then using 3rd party impulses is a crap shoot since there is no way for you to compare with the real mic counterparts.
With free individual impulses it is often frustrating since there are so many out there of varying quality. Then with packs for sale or free, they have positions and combinations and such, but sometimes positions even down to a 1/2" is not enough. Millimeters in any direction or angle can have rather large effect on the tone.
But even for myself I have never done a proper shootout properly isolating all the variables... until now.
Testing Procedure
The goal here is to isolate everything but the speaker cabinet vs. impulse. So I mic'd up an ENGL 4x12 Pro (Celestion Vintage 30 speakers) with a single SM57. It is roughly at the edge of the cap where the cone starts, maybe 5mm more on the cone side. Straight on and about 1 inch from the grill.
The amp is an ENGL Powerball. The impulse was generated via the ENGL Powerball FX return. Master volume: 9:00, Depth Punch: 11:30, Presence 2:30. Sine Sweep and Deconvolved with Voxengo's Deconvolver 12-Seconds at 32-bit float 44.1khz.
Preamp is a TNC-73 Chinese Neve Clone from a group buy. They are similar to a Chameleon Labs. I had it set to low impedance and driving the it a little hard with the output rolled back.
DI's were cut with a Schecter A-7 7-string (mahogany body, maple neck, rosewood fretboard) , bridge pickup, Seymour Duncan JB7, tuned to standard with low B. DI was an EWI LDB-1 into a Behringer ADA8000 modded with BB OPA4134 clocked via a DBX Quantum mastering processor.
Re-amping was done via a DIY Jensen style Re-amping interface with an Edcor WSM 10k:10k.
The reamping was done with all the same settings through the mic'd cab. Then again but capturing the signal from the pre-amp and run through the impulse of the mic'd cab set-up loaded up in Poulin's LeCab, no high pass or low-pass filters. All variables isolated except the cab/poweramp combination and speaker impulse.
Results
Each clip has 4-bars of 3 riffs double tracked on their own, then in a mix. Peak levels matched then adjusted slightly by ear.
16-bit 44.1Khz WAV Files. Below are 320kpbs MP3's.
ENGL Powerball Real Cab and SM57
ENGL Powerball Impulse
Interestingly I am having a hard time hearing a difference on my Roland MA-8's that are in my office. But in the studio the first thing that popped out was a increased high-end/upper mid-range and just sort of lacked depth and was just grindy.
From another perspective the Mic'd cab could be described as wooly and muddy and warm and distant. The Impulse being more clear and in your face. Plus people tend to like more high-end just like they like things louder and perceive distortion as being louder.
So to help minimize this perspective, I added a high-shelf to the Mic'd cab:
ENGL Powerball Real Cab and SM57 with a High Shelf
Oh how the plot thickens! Now the Mic'd cab to me has more buzz, but it has a crunch and a grind to it with a 3D-ness. The impulse sounds 2D and lacks depth, just something unpleasant.
So how do we add depth? Well besides EQing with the rest of the mix and using mids to move instruments, how about reverb? In this case the impulse should have grabbed the room as well. But maybe without the percussive nature of the sine sweep, we need a separate room impulse. So I threw on Cubase's REVerence with the default Studio Room Sample and blended to taste.
ENGL Powerball Impulse with REVerence
Future Tests
At this point it would be time for a blind test, and that will probably be for another time. My opinion is that you could work with this. To send this out blind without some "training" like this, it would be a total crap shoot, you can hear differences, but which is better? Which is the cab vs. the impulse. Maybe some new riffs and testing is in order.Also I would like to take some modelers, plugins and hardware and do the same tests. Through a cab and then through an impulse of the same setup. Maybe with some forum support, this can happen. Although I will likely have to start over with a new impulse since I can't leave my cab mic'd up into eternity.
Other Arguments
One could argue that the tone is bad to begin with so it is impossible to make a fair judgement. Well that may be true, but that isn't the point, it is relative to each other. Also the playing is so bad... well yeah. I focused on what I do, lots of chunk, some thrash, and some diminished chords, I mean at some point every engineer should do their own tests and come up with their own conclusions.With one mic (SM57) on the Powerball it is a careful balance. Usually I need to two mics, one getting mud and beef and a condenser for the highs. With a single 57 fizz is a problem, so I minimized that. But it is a bit muddy. Plus it needs some EQ as well. AKA. Mudball in some parts.
PHASE: Personally I could hear a big difference between the two on my monitors RAW, so I didn't try too hard to flip the phase. Once you get into processing, things get out of control. You can try on your own though since the guitars are panned hard left and right. But consider that there is a time delay between the speaker and the mic vs. the impulse. So you will have to compensate. Then you will want a frequency aware phase adjuster because of the time shift. Then since they are different takes, there will be some inherent clock skew which will give an exaggerated amount of left-over that will change over time. So go by the lowest amount.
At least for me this answers a BIG question: Are impulses a waste of time? I really wasn't sure. At this point I don't think they are, they are very close and definitely usable. Especially to the point where the average listener probably won't notice or care.
That being said I would probably still elect to mic a cab given the option.
Thursday, May 27, 2010
Audio CD Mastering Drives and Lite-On iHAP422 Review
Well I just installed my new Lite-On Drive iHAP422. In Audio Mastering the "standard" I guess was to get a Plextor Drive since they had this awesome CD tester called Plextools. Well Lite-On has a similar product called K-Probe. Plextor and Lite-On are the only ones that provide this capability. But Lite-On does make drive for lots of other brands. There is also Nero's DVD-Speed and DVDInfoPro which support selected brands and models as well.
"Mastering" technically is the creation of a glass master for replicated or stamping CD's. Duplication is burning CD-R's. So besides the sonic and creative aspects, a mastering engineers job is to pre-master a CD ready for the replication plant. To spec, a CD must have below 220 C1 errors per 10 second chunk which is actually quite high. Most respected mastering houses shoot for below 100, many for below 50. And you want no C2 Errors or CU errors.
In a nutshell C1 Errors are correctable errors, the others are not. They are caused by a combination of the media, drive, and the speed. There are a lot of internet folklore as to why this happens and I don't really know either. In general, slower tends to be better, but on modern faster drives, half the recommended speed tends to give better results. But really every drive and media combination is different. Some media/drive combinations may want full speed.
Taiyo-Yuden is regarded as the most consistently good media. They recently got bought out by JVC and used to be TDK. Most shelf brands buy their media from wherever they can get it the cheapest, so your results will definitely vary. So you will have to test on your own, but Taiyo-Yuden is cheaper in bulk online than shelf-brands anyway.
Back in the old days, things were a LOT more finicky. I own a SCSI Plextor Drive and a SCSI Yamaha drive since they were the best for their time. They were very picky about media. These days it doesn't matter as much but it is still something to keep in mind if you are burning your own masters for replication.
Better yet, leave it to a Mastering Engineer. But so many bands are going DIY or having their Mixing Engineers do the mastering. So for you guys:
- Plextors are hard to find and are expensive. Lite-On's are cheap and relatively easy to find.
Buy Taiyo-Yuden, JVC, or TDK media, or do a lot of testing and tuning.
- Get K-Probe. Test your masters after burning them. Shoot for below 100 C1 Errors per Second, I would say 50.
- Learn your burner and find which speed gives the lowest BLER/C1. But half-speed is a good starting point.
- Test EVERY disc. It only takes a minute and you know what you are sending out is good.
- I still listen to every disc too on an old CD-Player just to be extra sure and listen for clicks and pops or any other weirdness. The band should do the same.
- Get K-Probe. Test your masters after burning them. Shoot for below 100 C1 Errors per Second, I would say 50.
This particular drive so far is quite nice. From reading reviews, many are DOA so test it as soon as you get it so you can get another if it breaks. It is very fast and pretty quiet while burning. It has LightScribe which is cool for labeling discs, but terribly slow (20 mins for a full Disc). Now that I have a Disc Printer I will not bother with it anymore, but I have media to get through.
Just pulling some craptastic media, I was able to get a BLER of 11 and 66 TOTAL at 16X. Can't complain about that! I think on the report it was actually POSTECH!
With my new stock of Taiyo-Yuden Ink Jet Hub Printable Non-Branded media I got 0.. that's right ZERO C1 errors across the board! AMAZING! Call me crazy, but I think it even SOUNDS better than the crappy media. I have heard this theory before, I think it might be mostly placebo and I don't have the time to scientifically A/B double blind.
My old stock of TDK media on my ASUS drive gave me a BLER of 5 with 31 total which is quite impressive as well. So many drives will be fine for burning, but you can only test with a handful of them. You might as well go with a Lite-On where K-Probe is free and you get an awesome drive as well!
Thursday, April 8, 2010
Couple projects done and some updates.
Well it has been a while since I have had time to blog. But things are going pretty well in the Ortiz Audio side of things.
In January I finished up with Younger Brother. Straight up Rock and Roll that came out really well. It was a long haul with them, but the final product was worth it. There are samples on my site to hear for yourself. You can also find them on iTunes, Amazon, etc. Or you can get a disc off their website http://www.youngerbrotherband.com
Also finished up with Independent Progress. Started them in Feb. and was able to knock them out in month. Ty and I tried a new technique with these guys. Instead of doing DI's and re-amping, we built some awesome looking and sounding gobos. These allowed us to track them live and do overdubs on the spot. It was definitely the way to go. Their album came out great! You can grab their stuff off their website as well http://www.myspace.com/independentprogress
Also check Independent Progress on tour over the next couple of weeks. For you NM folks, they will be hitting The Underground in Albuquerque on April 12th. So check them out and say hello. They are cool dudes, so don't worry.
On the geeky side of things, I am checking out a new flash MP3 player for the site. Hopefully it will make things a bit smoother. Also got some new card designs and maybe website ideas in the works. Lots of stuff to post on, from new gear, to all sorts of fun things happening.
In January I finished up with Younger Brother. Straight up Rock and Roll that came out really well. It was a long haul with them, but the final product was worth it. There are samples on my site to hear for yourself. You can also find them on iTunes, Amazon, etc. Or you can get a disc off their website http://www.youngerbrotherband.com
Also finished up with Independent Progress. Started them in Feb. and was able to knock them out in month. Ty and I tried a new technique with these guys. Instead of doing DI's and re-amping, we built some awesome looking and sounding gobos. These allowed us to track them live and do overdubs on the spot. It was definitely the way to go. Their album came out great! You can grab their stuff off their website as well http://www.myspace.com/independentprogress
Also check Independent Progress on tour over the next couple of weeks. For you NM folks, they will be hitting The Underground in Albuquerque on April 12th. So check them out and say hello. They are cool dudes, so don't worry.
On the geeky side of things, I am checking out a new flash MP3 player for the site. Hopefully it will make things a bit smoother. Also got some new card designs and maybe website ideas in the works. Lots of stuff to post on, from new gear, to all sorts of fun things happening.
Saturday, January 16, 2010
NAMM 2010 Day 1 and 2
Well just back to the hotel after a long Day 2 at NAMM. Thanks to Keith Miller (www.km-guitarslinger.com) and Morley Pedals (www.morleypedals.com).
Thursday we flew in around noon and got stuck waiting to check in to the Hotel. So after some pizza and chicken buffet, we got all settled in and grabbed a shuttle to the show. We only had a couple of hours so Keith and I spent the time saying hi to the guys we know. Hit up the Carvin booth talked a few of the reps there. Then hit up the Morley booth to talk to Bill and check out their new mini-wah and mini-volume pedals which look sweet. Ran up to Digitech to see any new stuff they have, the highlights were their new stereo looper and single pedal looper.
Then for the rest of the day we got a full demo of the new Cakewalk V-Studio 700 and V-Studio 100. The V-Studio 100 is sweet. Full 8x6 interface with control surface and digital mixer. It also has 2-track recording standalone. The 700 is way crazy cool. Tons of neat features... very expensive though. Also talked with Ronnie North and watched him shred for a bit. Also watched some 12-year olds absolutely kill at singing some Dio-Era Black Sabbath covers. F'n awesome! Then turned in a bit early to chill.
Today we got there early. Saw a ton of gear and a ton of artists doing demos and just jamming. It is very humbling to come to NAMM, the amount of talent is just staggering. Performance highlights were definitely Flametal which were awesome! Checked out a wicked 80's shredder that I don't know at the Boss/Roland...arena. Saw some wicked jazz guys and chapman stick dudes.
Gearwise, the new Steven Slate plugins and hardware are amazing! Their new mastering suite is awesome and the plans are for it to come with a MIDI controller. It is super easy and really really good sounding mastering stuff and console simulation. We got to sit through a full on demo of all their products... amazing! Mesa has a new lunch-box type amp which looks really sweet! Checked out all the Eminence speakers with their magic speaker switcher... oh and I got to demo them for PRS guitars!
Played on the new Egnater amps geared for Metal. They were sweet and had tons of options...going to stick to ENGL though. Played on some Carvin stuff which was sweet. Their BX500 rocks, but their new B2000 and B1500 sound great and are also lightweight. They got some new mixers, dual cut-away guitars, and basses. Their finishes are downright spectacular. I see a new bass amp and probably a 7-string in my future. Presonus is releasing a 24-channel studio-live mixer. They have new controller software which makes it a perfect console for live use and recording.
Starwise, there are tons of people this year, so artists are just getting mobbed and the lines are really long. Plus you really see stars everywhere, I mean everywhere. But they are often busy and I hate bothering them. So I stargazed last year, this year it is about the gear!
Really cool thing is that this year we have "Artist" passes. So we were cool enough to get into the Coffin Case fashion show and event. Saw Renegade Brides, Iron Maidens, and Thunderstruck. Awesome awesome awesome and deadly hot. Then the 2 fashion shows were jaw dropping. Beautiful girls and actually cool clothing. I got lots of video to share a bit later. It was very cool to get in there and check it out.
Definitely looking forward to hitting it again tomorrow. I think I might check out some classical guitars and see if I can actually play the new little Mesa Lunchbox.
RAWK ON!
Thursday we flew in around noon and got stuck waiting to check in to the Hotel. So after some pizza and chicken buffet, we got all settled in and grabbed a shuttle to the show. We only had a couple of hours so Keith and I spent the time saying hi to the guys we know. Hit up the Carvin booth talked a few of the reps there. Then hit up the Morley booth to talk to Bill and check out their new mini-wah and mini-volume pedals which look sweet. Ran up to Digitech to see any new stuff they have, the highlights were their new stereo looper and single pedal looper.
Then for the rest of the day we got a full demo of the new Cakewalk V-Studio 700 and V-Studio 100. The V-Studio 100 is sweet. Full 8x6 interface with control surface and digital mixer. It also has 2-track recording standalone. The 700 is way crazy cool. Tons of neat features... very expensive though. Also talked with Ronnie North and watched him shred for a bit. Also watched some 12-year olds absolutely kill at singing some Dio-Era Black Sabbath covers. F'n awesome! Then turned in a bit early to chill.
Today we got there early. Saw a ton of gear and a ton of artists doing demos and just jamming. It is very humbling to come to NAMM, the amount of talent is just staggering. Performance highlights were definitely Flametal which were awesome! Checked out a wicked 80's shredder that I don't know at the Boss/Roland...arena. Saw some wicked jazz guys and chapman stick dudes.
Gearwise, the new Steven Slate plugins and hardware are amazing! Their new mastering suite is awesome and the plans are for it to come with a MIDI controller. It is super easy and really really good sounding mastering stuff and console simulation. We got to sit through a full on demo of all their products... amazing! Mesa has a new lunch-box type amp which looks really sweet! Checked out all the Eminence speakers with their magic speaker switcher... oh and I got to demo them for PRS guitars!
Played on the new Egnater amps geared for Metal. They were sweet and had tons of options...going to stick to ENGL though. Played on some Carvin stuff which was sweet. Their BX500 rocks, but their new B2000 and B1500 sound great and are also lightweight. They got some new mixers, dual cut-away guitars, and basses. Their finishes are downright spectacular. I see a new bass amp and probably a 7-string in my future. Presonus is releasing a 24-channel studio-live mixer. They have new controller software which makes it a perfect console for live use and recording.
Starwise, there are tons of people this year, so artists are just getting mobbed and the lines are really long. Plus you really see stars everywhere, I mean everywhere. But they are often busy and I hate bothering them. So I stargazed last year, this year it is about the gear!
Really cool thing is that this year we have "Artist" passes. So we were cool enough to get into the Coffin Case fashion show and event. Saw Renegade Brides, Iron Maidens, and Thunderstruck. Awesome awesome awesome and deadly hot. Then the 2 fashion shows were jaw dropping. Beautiful girls and actually cool clothing. I got lots of video to share a bit later. It was very cool to get in there and check it out.
Definitely looking forward to hitting it again tomorrow. I think I might check out some classical guitars and see if I can actually play the new little Mesa Lunchbox.
RAWK ON!
Sunday, November 22, 2009
Tracking for Third Party Mix (part 1)
I often get approached by bands to do their mixing for them. Sometimes I have an offer to do mixing. I enjoy it and I think it is a good opportunity to get another set of ears on a project. Or maybe you are tracking your project at home, to save some money.
This is the first part of a series that will talk about getting tracks ready for another engineer. This first part will be about tracking techniques that many engineers use, but many don't.
Most of these is what I call "insurance" so I do them anyway, even if I am mixing. But basically it gives the next engineer a lot more options and can make up for some of the pitfalls of smaller/home studios.
So here are some things to think about when tracking:
But have fun, that attitude shows on a recording. Don't rush, get solid performances, that is the most important. Back in the early days, recordings were done with the equivalent of coffee cans and boom boxes, and those sounded amazing because the performances were awesome and the musicians were awesome.
Also be realistic to some degree. You won't sound like a grammy winning band by paying your tracking engineer a few hundred bucks, mixing engineer a few hundred, through your cheap amps and cheap guitars, in a basement or garage with some foam lined closets. There are exceptions of course... But grammy winning songs are still grammy winning songs.
This is the first part of a series that will talk about getting tracks ready for another engineer. This first part will be about tracking techniques that many engineers use, but many don't.
Most of these is what I call "insurance" so I do them anyway, even if I am mixing. But basically it gives the next engineer a lot more options and can make up for some of the pitfalls of smaller/home studios.
So here are some things to think about when tracking:
- Crap In = Crap out: This applies to performance and instrument quality. DO NOT depend on "We'll fix it in the mix." So strive to get the best sound you can dry. If the mix sounds pretty awesome with just the faders up, then the final mix will really sound awesome. You can refer to this: Bare Minimum Preparation for the Studio. But your performances really need to be solid, that is probably the most important part.
- Drums: This is the foundation of a mix. The kit must absolutely be in tune! Also make sure the heads are new (or at least not totally dead) and that all the squaks, rattling, and excessive ringing are taken care of. With remixes I tend to do a lot of sample blending or replacement. In rock and metal it is pretty much mandatory.
- I like to try and get the kit to sound pretty good with just Overheads and Kick. Then the other mics are just extra.
- Mic every drum. I prefer dynamic cardioid mics because they give a distinct transient that is great for sample replacement if necessary.
- Mic snare top and bottom. This is handy to get some extra snap.
- Mic HighHat and Ride. Since these tend to get buried, I like to have them just in case. 90% of the time I don't actually use them. But the 10% I used them, I really really needed them.
- Room mic, these are really handy and can add a lot of extra ambience. Even if this is a 1-room live tracking session, that room mic can really fill out the mix.
- Be careful of mic phase!! This can be a huge deal.
- Name the Overheads in regards to Hat and Ride. DO NOT use right and left, I have no idea what perspective that is from and it can be a real PITA trying to figure it out.
- Guitars: Make sure they are in tune and intonated. Can't fix bad tuning.
- Take some time with mic placement to get a good tone from the amp. Please don't just "throw a mic" on there unless you aren't trying for good tone. Even modelers are fine here which leads me to #2.
- Take a straight GUITAR DI. This is insurance so I can re-amp that signal later. If the pickups are passive, ideally you want an Active DI box with an Input Impedance of 1M Ohm or more. Active pickups you can use anything as long as it isn't noisy. But I will take what I can get.
- Effects DI. This is if the guitar player uses a lot of wah or special effects before going into their amp.
- Amp FX Loop out DI. This is essentially the amps preamp out. Again this is insurance for tonal options. I can run this signal through "Impulses" of acoustic spaces and speaker cabinet mic combinations. This can help make up for non-deal rooms, cabs, and mic combinations.
- This is a lot of DI's and a LOT of tracks. Many studios don't even have this many DI's. So the most important is the Guitar DI track or the Effects DI depending on the player. Most I can use just the Guitar DI for most of the stuff. Then I will do another set of takes with Wahs, which I consider leads. With Wah's definintely take a DI after the wah. But most stuff like Delay, Reverb, Compression I handle in the.
- Ideally you want the best sound you can from the mic and the amp. It is just insurance. I don't know how many times I have gotten a band to mix and the amps just sound like rattling plastic in a cardboard box.
- Bass: Yet another foundation of the mix. Depending on the player and the bass, this can be the easiest and the hardest to get right.
- Use a good DI right from the bass. I will use this for re-amping or sometimes just as is.
- Mic the cab. I like to use a large diaphragm dynamic for things like kick drums and floor toms. Then I will use an SM57 for attack. This is especially true if the player likes distorted or overdriven bass. The DI will just not capture that.
- Listen very carefully for intonation and out of tune issues. Also listen for tightness with the kick. This can make the difference between a really punchy sound and a sorta punchy sound.
- Vocals: Performance is everything here and again shoot for a good sound without any mix magic.
- For mics, use a large diaphragm condenser at least. Don't even care about the brand. But better brands are much nicer. Ideally you really want to spend the time to find a good mic and pre combination that captures and accents the voice.
- Try to minimize excessive echos, noise, and bleed from headphones.
- Minmize the ssss' and the pop's. Use a pop filter and rotate the mic a bit at an angle.
- I can do some atrocious things with pitch correction and fixing timing, but I can't add feeling or angst or sadness or whatever you are trying to portray.
But have fun, that attitude shows on a recording. Don't rush, get solid performances, that is the most important. Back in the early days, recordings were done with the equivalent of coffee cans and boom boxes, and those sounded amazing because the performances were awesome and the musicians were awesome.
Also be realistic to some degree. You won't sound like a grammy winning band by paying your tracking engineer a few hundred bucks, mixing engineer a few hundred, through your cheap amps and cheap guitars, in a basement or garage with some foam lined closets. There are exceptions of course... But grammy winning songs are still grammy winning songs.
Friday, October 16, 2009
Komplete 6 (Guitar Rig 4, Absynth, Kontakt 4)
I was one of the fortunate ones to grab Native Instruments Komplete 5 when it was on sale for $399 a couple of months ago. I really wanted the Orchestras in Kontakt, the Akoustik Piano, and the Hammond B4. I figure the rest was just a bonus.
Anyway Komplete 6 came out and the upgrade was only $149 so I picked it up. The feature that excited me most was Kontakt 4 which included natural sounding Choirs. Really excited! Guitar Rig 4 and new versions of Absynth again were just bonuses.
For the record... I am not really a synth guy. I also can work my way around a keyboard because of a couple music theory classes and what I know from guitar.
Well after about 6 hours of install time (lots of DVD's) I got it up and running. The choirs sound great! Of course they aren't as nice as the demos from East West, but at 1/10th the price they are definitely convincing if you apply them properly. The new string engines are also excellent for orchestrations. Lots of potential in there. So that was definitely as good as can be expected.
Guitar Rig 4 was actually a very nice suprise. Sonically there are huge improvements over 3. I mean 3 sounded pretty good, usable, convincing with some tweaking. Guitar Rig 4 is much much better. Much more organic and just feels a lot better. The core tone has seen significant improvements. Now it doesn't match an amp in the room, that would be weird. But as far as matching the sound of an amp, mic'd and listening through monitors, it is VERY convincing.
The new "Control Room" where you can mix and match mics with levels really lets you dial in some stellar tone. The "Cabinet" component sounds great as far as the mic positions and cabs they give you. But the mic placement is limited and none of them point where I would like. Using 2 instances with a splitter module got me close but not quite. Just moving a mic fractions of an inch can make big differences in tone.
With LePou's Cabinet and Recabinet impulses, things started to really come alive. Clean and high/mid gain tones were just rocking. Like playing guitar in the control room with the amp mic'd up in an isolation booth. Good enough for me. Unfortunately I couldn't get a Metal tone I liked. It is hard to compete with my ENGL Powerball with matching Vintage 30 cab. I could get something generically recto-ish or very saturated solid state gain which would work, but it didn't have the richness.
It all "felt" really good and responded, but I couldn't get the balance of low-mid grind with upper mid clarity of say an ENGL or 5150. For Metal tones there is so much free stuff out there, I would try those first.
But for Rock tones, this is the first one I have used that doesn't have weird upper midrange hashing. Or tone that is too harsh or too muddy, I was impressed. Lots and lots of potential there.
Anyway Komplete 6 came out and the upgrade was only $149 so I picked it up. The feature that excited me most was Kontakt 4 which included natural sounding Choirs. Really excited! Guitar Rig 4 and new versions of Absynth again were just bonuses.
For the record... I am not really a synth guy. I also can work my way around a keyboard because of a couple music theory classes and what I know from guitar.
Well after about 6 hours of install time (lots of DVD's) I got it up and running. The choirs sound great! Of course they aren't as nice as the demos from East West, but at 1/10th the price they are definitely convincing if you apply them properly. The new string engines are also excellent for orchestrations. Lots of potential in there. So that was definitely as good as can be expected.
Guitar Rig 4 was actually a very nice suprise. Sonically there are huge improvements over 3. I mean 3 sounded pretty good, usable, convincing with some tweaking. Guitar Rig 4 is much much better. Much more organic and just feels a lot better. The core tone has seen significant improvements. Now it doesn't match an amp in the room, that would be weird. But as far as matching the sound of an amp, mic'd and listening through monitors, it is VERY convincing.
The new "Control Room" where you can mix and match mics with levels really lets you dial in some stellar tone. The "Cabinet" component sounds great as far as the mic positions and cabs they give you. But the mic placement is limited and none of them point where I would like. Using 2 instances with a splitter module got me close but not quite. Just moving a mic fractions of an inch can make big differences in tone.
With LePou's Cabinet and Recabinet impulses, things started to really come alive. Clean and high/mid gain tones were just rocking. Like playing guitar in the control room with the amp mic'd up in an isolation booth. Good enough for me. Unfortunately I couldn't get a Metal tone I liked. It is hard to compete with my ENGL Powerball with matching Vintage 30 cab. I could get something generically recto-ish or very saturated solid state gain which would work, but it didn't have the richness.
It all "felt" really good and responded, but I couldn't get the balance of low-mid grind with upper mid clarity of say an ENGL or 5150. For Metal tones there is so much free stuff out there, I would try those first.
But for Rock tones, this is the first one I have used that doesn't have weird upper midrange hashing. Or tone that is too harsh or too muddy, I was impressed. Lots and lots of potential there.
Sunday, August 30, 2009
MCM 50-7774 D/A Converter Mods

This D/A from MCM Electronics (50-7774) is for stereos but uses a nice BurrBrown PCM1716 DAC chip. It sells for a little over $100 but you can get it on sale for cheaper if you wait for a coupon code.
The weakspot is the use of a 4558 dual op-amp. But it does use .1uF ceramic bypass caps and 220uF output caps.
Stock it sounds great! Comparing it to my MOTU 828 mk3 it had slightly less low-end and you lost a bit of detail. I had to actually A/B side by side using my monitor switcher to hear the difference. It was really close.
Really the components look pretty solid stock. Good caps and metal film resistors which I don't commonly see in the stuff I typically mod. It is strange that they skimped on the output chip. So even stock it is a fantastic deal.
To test I used a SM Pro Audio M-Patch 2 (full passive) with my Dynaudio BM5A and Yamaha HS80M's.
After the mod everything was much truer sounding and the instrument separation was much better with more detail. The MOTU was murkier, but maybe more pleasant and warmer. I can't say night and day, but it was noticeable for sure. Listening to MP3's I could hear the MP3 compression in the upper mids which was annoying, but a very good thing for mixing. CD's and mixes I pulled up, I wasn't suprised per se, but I could more clearly hear some of the issues and detail. I am excited to do a mix on these!
So I would say an upgrade for sure. Even at $105 for the converter, then $20 in parts, it is a steal! Even stock, it was a huge upgrade compared my consumer CD Player and DVD player. I may buy another one for my home entertainment system or my computer.
The mod was pretty easy. This was my first time modding SMD so that was a unique challenge. Tweezers, flux, magnifying glass, good light, and .02 or smaller solder make this go a lot easier. There are lots of tutorials online which I found helped a lot. It really wasn't that bad. In some ways I actually enjoyed it more than through hole.
Parts:
- MCM Electronics 50-7774
- 2x Analog Devices AD4898 (Digikey: ADA4898-1YRDZ-ND)
- 2x Panasonic FM Series 470uF 25V caps. You can use Nichicon HE also. You want low ESR. For the Panasonic you want the thinner ones, but they were out of stock, so I went with the fatter ones (Digikey: P12388-ND)
- 2x .1uF 25V or higher Polypropylene Film. MIT brand is good, but really any .1uF will be fine as long as it is Polyester or Polyprop. If you go ceramic for some reason go NP0/C0G. 1% tolerance is great but expensive and hard to find. 10 or 20% is just fine and you can find them all over. I always have a bunch on hand. I think these were Panasonics too, but I often buy Xicon .1 uF 10% from Mouser in semi-bulk since they are small and cheap.
- Brown Dog Adapter 031101A which will allow the 2 AD chips to be used as a dual chip.
On the Gearslutz forum there is talk about upping the power supply to a 13.5 volt one. This is great and the added voltage will add more headroom. Also if it is better regulated that will definitely help. The one that comes with it is a 12 VDC 1.7 Amp switchmode adaptor. Testing it with a DMM shows that it does fluctuate a bit.
The problem is finding a well "Regulated" 13.5 wall wart or power supply without spending $30 or more. At least I couldn't find one. From looking at everything, it looks like you might be able to go even higher depending on the chip specs. If you find one in the US, please let me know!
The best would be to build a custom power supply with a decent transformer and an LM317 regulator. But that is a lot of work and expense. Plus then you are working with mains voltage which is much more dangerous. There is always a fine line with mods as to how much is worth it.
Pictures with Captions
UPDATE: Ok, wow, I just finished up a mix using this D/A and it sounds awesome! I actually started with my MOTU, got about 60% there and then switched and my mix was a mess. I could really tell. So A/B'd for a bit and the difference was clear. The MOTU just sounded vailed and not as clear. Less low-end, muddy, with some weird midrange issues. So that set me back a bit and I started up again. The mix has a few issues still, it was getting late so I bounced it down to listen to in my other environments. I have to say, it is definitely the first time the mix has sounded "better" in the car.
This is documenting my experience with this mod. This is for information and does not imply that you should void your warranty, injure yourself or damage your equipment. Do this at your own risk! I cannot be held liable for any damages or injury.
Tuesday, July 14, 2009
Notes on Audio Op-Amps
I am getting back into modifying some gear and I figured I would post the notes that I have collected on Op-Amps over the years.
Just some random collected information about certain OpAmps.
Sites with OpAmp Reviews: http://tangentsoft.net/audio/opamps.html
http://audioreviews.blogspot.com/2005/10/flavors-of-audio-op-amps.html
http://www.rock-grotto.co.uk/opamp.htm
Designing with OpAmps
DIY Audio Thread... Best OpAmp
OPA2604/OPA2134 good replacement for TL072 however be careful of powersupply overtaxing
TL052,TL062 higher quality TL072 at low voltages
TL0xx are FET input, dc offset irrelevant. But can cause problems when replacing with BJT input opamps.
FET for BJT NOT BJT for FET
TL062 often better than TL072
OPA2227 for TL072 - not cheap
MC33078 for TL072
OPA627 better than NE5532
OPA627 sounds tube-like
OPA2132 is good as well
OPA404
MC33079 ro LM837
NJM2114 supercharged NE5532
LM4562 very netural, recommended
LM6172 with some help for ART Tube MP mod how about TI burr brown ...like opa4132 (seems to be an excellent audio quad), opa4134 (not really the same but very good as well), opa4227 (the ...227 series sound VERY good as replacement opamps in my modded SPL vitalizer from 1994!)...just a thought... Very Happy
Better parts are available for summing. You want very large open loop gain in the audio band to resolve all those channels with low noise. The LME49720 is much better as is the AD 8599. The LM6172 has too great a bandwidth and too much noise to use as a summing opamp, it will have stability issues.
Jim Williams
Audio Upgrades
Digikey apparently knows that the LM4562 and the LME49720 are the same part.
Contact Dave Hill at Jensen for the exact transformer model. It's designed for this preamp as Jensen designed the preamp for Presonus. It's a great value, only around $30, about 1/2 what their premium transformers cost. You will need a Hakko 808 or similar desoldering tool to remove the old Chi-com transformer without pulling out plated through holes of the pcb. If the zorbal network also needs to be changed, Jensen provides the parts for that with the transformers. Best parts for opamps are the LT1357 and the OPA211. The OPA827 is a great fet input amp, better than the overpriced and dull sounding OPA627. Don't forget the quad surface mount MC33079 for the inserts, I use a LT1359 or a LM49740, a BB OPA4134 will also work. The balanced output opamp is a through hole 5532, I use the very fast high current LM6172. Replace the output coupling caps with 220 uf 25v Panasonic FM's. Presonus power supplies are set to + - 20 volts, too high for these 18 volt parts, there is a screwdriver trim pot to reset to 18 or 17 volts.
Jim Williams
Audio Upgrades
Hi there. Thanks for interest in the Eureka and in modifying... The Eureka ships with a pretty good transformer, our own model, and TI (Texas Instruments) op-amps, which are pretty much industry standard and fairly quiet and transparent. Though it's based on the same preamp circuit as our VXP, MP20, and M80, I would characterize it as being slightly brighter, perhaps. I never thought of it as edgy, but that may be a fair description. I think it's slightly brighter because the normal impedence setting (2500) for the Eureka is slightly higher than the open impedance of the transformer, which provides the input imdepance for the older models, as they don't have the added impedance selector circuit. I could be wrong, but I suspected that's what accounts for the slightly different sound. Because the impedance is set before the mic hits the transformer, the transformer mod is a bit more subtle/harder to hear on the Eureka than in our older units. It's also significantly more difficult to disassemble than our older models. For that reason, I usually suggest that people pass on transformer-modding the Eureka. Of course, if you really want to, you can. The only 2 direct-replacement drop-in alternatives that exist are the Audisar Plus-8 and the Jensen JT-11K8-APC. Both are very fine parts. Email me for info if you need to know how to obtain these. PreSonus doesn't carry upgrade components, but I don't have a problem in pointing people in the right direction. I'm a tweaker/mod guy myself, so I can definitely understand the urge to improve stuff.
What's alot easier to do is to replace the op-amp chips and there are several on the market. The most popular is the Burr Brown BB-OPA627. Our stock chip is actually among the quieter ones available, and so though you'll sacrifice a few db in noise performance by taking ours out, most people claim the BB part is 'bigger, beefier, better heft on the bottom end', etc.. Second most popular is the Analog Devices AD-797AN, which sonically, people say is pretty much like our stock part but just performs a bit better. Faster transient response, greater clarity, clearer image, better attack, better detail, etc. ... but I am talking subtleties. Another chip option is the Linear Technologies 1357 (Digi-Key full part number: LT-1357CN8-ND). This chip is possibly the most quiet one on the market, super noise and distortion performance. It's actually also one of the most affordable. Only $4.63 each from Digi-Key. This is the piece I use myself, so I can capture the cleanest, most accurate sound and then give it color later if I choose to. If you want surgical accuracy, this is the way to go. If you want added warmth/bottom, the BB part is the way to go. The TI and AD lie somewhere in the middle. I hope this info is useful, have fun!
Chad Kelly
PreSonus Audio
Just some random collected information about certain OpAmps.
Sites with OpAmp Reviews: http://tangentsoft.net/audio/opamps.html
http://audioreviews.blogspot.com/2005/10/flavors-of-audio-op-amps.html
http://www.rock-grotto.co.uk/opamp.htm
Designing with OpAmps
DIY Audio Thread... Best OpAmp
OPA2604/OPA2134 good replacement for TL072 however be careful of powersupply overtaxing
TL052,TL062 higher quality TL072 at low voltages
TL0xx are FET input, dc offset irrelevant. But can cause problems when replacing with BJT input opamps.
FET for BJT NOT BJT for FET
TL062 often better than TL072
OPA2227 for TL072 - not cheap
MC33078 for TL072
OPA627 better than NE5532
OPA627 sounds tube-like
OPA2132 is good as well
OPA404
MC33079 ro LM837
NJM2114 supercharged NE5532
LM4562 very netural, recommended
LM6172 with some help for ART Tube MP mod how about TI burr brown ...like opa4132 (seems to be an excellent audio quad), opa4134 (not really the same but very good as well), opa4227 (the ...227 series sound VERY good as replacement opamps in my modded SPL vitalizer from 1994!)...just a thought... Very Happy
Better parts are available for summing. You want very large open loop gain in the audio band to resolve all those channels with low noise. The LME49720 is much better as is the AD 8599. The LM6172 has too great a bandwidth and too much noise to use as a summing opamp, it will have stability issues.
Jim Williams
Audio Upgrades
Digikey apparently knows that the LM4562 and the LME49720 are the same part.
Contact Dave Hill at Jensen for the exact transformer model. It's designed for this preamp as Jensen designed the preamp for Presonus. It's a great value, only around $30, about 1/2 what their premium transformers cost. You will need a Hakko 808 or similar desoldering tool to remove the old Chi-com transformer without pulling out plated through holes of the pcb. If the zorbal network also needs to be changed, Jensen provides the parts for that with the transformers. Best parts for opamps are the LT1357 and the OPA211. The OPA827 is a great fet input amp, better than the overpriced and dull sounding OPA627. Don't forget the quad surface mount MC33079 for the inserts, I use a LT1359 or a LM49740, a BB OPA4134 will also work. The balanced output opamp is a through hole 5532, I use the very fast high current LM6172. Replace the output coupling caps with 220 uf 25v Panasonic FM's. Presonus power supplies are set to + - 20 volts, too high for these 18 volt parts, there is a screwdriver trim pot to reset to 18 or 17 volts.
Jim Williams
Audio Upgrades
Hi there. Thanks for interest in the Eureka and in modifying... The Eureka ships with a pretty good transformer, our own model, and TI (Texas Instruments) op-amps, which are pretty much industry standard and fairly quiet and transparent. Though it's based on the same preamp circuit as our VXP, MP20, and M80, I would characterize it as being slightly brighter, perhaps. I never thought of it as edgy, but that may be a fair description. I think it's slightly brighter because the normal impedence setting (2500) for the Eureka is slightly higher than the open impedance of the transformer, which provides the input imdepance for the older models, as they don't have the added impedance selector circuit. I could be wrong, but I suspected that's what accounts for the slightly different sound. Because the impedance is set before the mic hits the transformer, the transformer mod is a bit more subtle/harder to hear on the Eureka than in our older units. It's also significantly more difficult to disassemble than our older models. For that reason, I usually suggest that people pass on transformer-modding the Eureka. Of course, if you really want to, you can. The only 2 direct-replacement drop-in alternatives that exist are the Audisar Plus-8 and the Jensen JT-11K8-APC. Both are very fine parts. Email me for info if you need to know how to obtain these. PreSonus doesn't carry upgrade components, but I don't have a problem in pointing people in the right direction. I'm a tweaker/mod guy myself, so I can definitely understand the urge to improve stuff.
What's alot easier to do is to replace the op-amp chips and there are several on the market. The most popular is the Burr Brown BB-OPA627. Our stock chip is actually among the quieter ones available, and so though you'll sacrifice a few db in noise performance by taking ours out, most people claim the BB part is 'bigger, beefier, better heft on the bottom end', etc.. Second most popular is the Analog Devices AD-797AN, which sonically, people say is pretty much like our stock part but just performs a bit better. Faster transient response, greater clarity, clearer image, better attack, better detail, etc. ... but I am talking subtleties. Another chip option is the Linear Technologies 1357 (Digi-Key full part number: LT-1357CN8-ND). This chip is possibly the most quiet one on the market, super noise and distortion performance. It's actually also one of the most affordable. Only $4.63 each from Digi-Key. This is the piece I use myself, so I can capture the cleanest, most accurate sound and then give it color later if I choose to. If you want surgical accuracy, this is the way to go. If you want added warmth/bottom, the BB part is the way to go. The TI and AD lie somewhere in the middle. I hope this info is useful, have fun!
Chad Kelly
PreSonus Audio
Here is a great link I found in regards to OpAmps, great stuff!
http://nwavguy.blogspot.com/2011/08/op-amp-measurements.html
Wednesday, February 4, 2009
New Pedalboard
After many years of running around with my trusted old pedalboard I decided it was time for some changes. For any guitarist it is always evolving. Mine has changed a lot over the years. New gear, different sounds, different bands. With Sangre Mal, we are doing enough complicated stuff with samples and loopers, that it was time for an upgrade.
I looked around at buying one. But they are so expensive and wouldn't really cover all of my needs. Even the multi-tiered ones are too short, or the tier doesn't extend to the end of the board. Also I didn't want a lip that is found on many ATA cases since it makes it hard for me to hit my MIDI board with my boots on stage. So I went the DIY route. Maybe later I will build a better case for the board.
I used 1/2" plywood that I had leftover in my garage. Primed and painted black. No VELCRO. I find that it doesn't hold for crap and the industrial stuff defaces your pedals. Zip ties are a much better alternative. Maybe just a bit less flexible. They are also a bit of a pain to work with. I should have bought a zip tie gun.
Wednesday, January 28, 2009
NAMM 2009
Got back from NAMM a couple of weeks ago. First off I have to thank Keith Miller (http://www.km-guitarslinger.com/) for hooking up the passes this year. Check out his website, he is an amazing player and an awesome dude. BTW-For those that don't know, I play rhythm guitar in his band.
This year I did a lot more stargazing than I normally do. The past 2 years have been more about gear. But in reality not that much stuff comes out from year to year. So after seeing the bulk of it you can browse a bit more and just check out the new stuff.
Also on Friday and Saturday it is the busiest. So you don't really have the opportunity to try a lot of stuff. Thursday and Sunday are really the days to go for gear. Friday and Saturday for stars.
But as always, I saw a lot of awesome players, and some great bands. Also lots of gear that I want:
- The new Madison amps sound pretty good.
- ENGL has a new combo that looks sweet.
- Mesa is releasing their Mark V which soundeds awesome.
- AXL bought the VHT name and their amps are way overpriced.
- The Giannini 7-String classical guitars really look sweet. They are soft sounding but where hard to hear in all the fuss.
- Lots of new signature lines from various guitar companies. Eh, I can't afford any of them anyway. Especially since I take a cheapy and make it play awesome.
- Carvin is releasing the Steve Vai Legacy II amplifier which sounds sweet. Also they have a new bass amp that puts out 500Watts, weighs 5lbs, and is $500. Sweet! Their new line of PA amps go up to 3800Watts and only weight 16lbs.
- Steven Slate Drums 3.0 looks and sounds absolutely awesome! I am really excited to get my hands on that.
- Tube Grinder released a vacuum tube replacement that is not a vacuum tube. It is a solid state device that can be tuned to act like a tube. Awesome idea, but not $139 awesome. Especially compared to $12 for a real tube.
- Peavey is releasing their 6505+ 1x12 combo which sounds awesome. Also their Vypyr tube series is ready to go with "no bugs!" At least according to an engineer. Apparently, the first set were the pilot run that marketing pushed through. Well those folks in marketing don't work for them anymore.
Anyway I am sure there is more I am forgetting. I still checked out a lot of stuff. I especially hit a lot of parts manufacturers and such as well.
But here are some pictures:
Monday, November 3, 2008
Bare Minimum Preparation for the Studio
If you search around the internet or talk to studio guys there are lots of tips for getting ready to enter the studio. They are all great and mostly true. But many of them consider the ideal situation. An yeah, of course it is nice to able to meet this ideal.
But let's be honest, most bands are not ideal. Instruments and supplies are expensive. My band included, we don't have the money to have the best instruments in tip-top shape, re-tube and burn-in amps, re-head all the drums, acclimate them, etc. Basically we have to work with what we have or what we can afford.
So I would say this is some of the bare minimum stuff:
- Rehearse - Seems obvious. You can definitely piece together songs in the studio. But knowing them is best. At least be able to play the songs and tightly. Studio magic is fairly limited and we can only make a great performance perfect, not a bad performance great or even good.
- Drums - Most important thing here is to tune your drums. The heads can be old as long as they are in tune. Yeah new heads and cymbals are nice too, but if you like the sound then I can make it work. Even if I sample replace the whole drum kit, that tuning bleeds into the overheads which I can't fix. Also at least tape down any rattling parts and WD-40 any squeaks.
- Intonate Guitars and Bass - Tuning is the most important here which is obvious. But bad intonation will make all your notes out of tune. I can do this for you if you don't know how.
- Change Guitar Strings - Ok maybe they don't have to be super new. But it is $3-$5 a set. Even if you don't like the "new string" sound, break them in a bit. Old strings intonate badly and you loose pick attack. I can do this for you if you are unable.
- Be Ready for LONG day - For cheap rates, most folks block book a day. I do the same. A 10 hour day is pretty standard. Some guys will push 12 hours. Yeah it is broken up a bit while you rest/listen/other members track/etc. but be ready for quite a day. There is rarely a "really quick" in the studio. So get plenty of rest and don't party down too hard the night before. If you feel bad, it will be a bad performance.
- Vocals - Your body is your instrument. So take care of it. Eat well, take some vitamins, stay hydrated, and get plenty of rest.
Subscribe to:
Posts (Atom)